How to Crochet a Magic Ring: Step-by-Step for Beginners (and How to Keep It Closed)
The magic ring (or magic circle) is the start of nearly every amigurumi. Here is how to make one, close it tightly, keep it closed, and what to do when it fights you.
Save this guide to Pinterest
Almost every amigurumi pattern starts with the same instruction: "6 sc in a magic ring". If that line has ever stopped you, you are in good company. This tutorial explains how to crochet a magic ring one move at a time, how to close it so there is no hole, and how to keep it from slowly opening up later.
What is a magic ring and why use it?
A magic ring (also called a magic circle, magic loop or adjustable ring) is a loop of yarn that you crochet your first round into, then pull tight. Because the loop can shrink to nothing, the centre of your work closes completely. The older method, chaining a few stitches and joining them into a ring, always leaves a small hole, which on a toy can let stuffing peek through.
That is why the magic ring is one of the technique lessons in most LoopSouk patterns, alongside the invisible decrease.
What you need
- A smooth, light-coloured DK (category 3) yarn, easy to see while you learn
- A 3.5 mm crochet hook
- A stitch marker
Avoid practising in chenille or very fuzzy yarn. Once you have the movement in your hands, switch to any yarn you like.
How to crochet a magic ring, step by step
- Make a loop around your fingers. Drape the yarn over two fingers of your non-dominant hand so the tail hangs in front, then wrap the working yarn around to cross over the tail, making an X on top of your fingers.
- Insert the hook under the loop. Slide the hook under the strand closest to your fingertips (the loop around your fingers), going from front to back.
- Pull up a loop. Catch the working yarn behind the X and pull it back under, so you have one loop on your hook.
- Chain 1 to secure. Yarn over and pull through the loop on your hook. This chain does not count as a stitch; it locks the ring so it will not slip off.
- Work stitches into the ring. Insert the hook into the centre of the ring, under both the ring and the tail, and work single crochet stitches. Most amigurumi patterns ask for 6 sc.
- Pull the tail to close. Hold the stitches and pull the yarn tail firmly until the centre hole closes completely. Tug again after a moment, as the ring often relaxes slightly.
- Join or continue in a spiral. Most amigurumi is worked in a continuous spiral, so place a stitch marker in the first stitch and carry on with round 2. If your pattern says so, slip stitch into the first stitch to join instead.
That's it: you have finished round 1. Count your stitches, which should be 6 for most patterns, and you're ready to start increasing.
How to keep a magic ring from coming undone
The most common complaint is a ring that looks perfect on day one and opens into a small hole after the toy is stuffed and squeezed. These habits prevent it:
- Pull in two stages. Pull the tail until the hole closes, work round 2, then pull again before weaving in.
- Weave the tail in two directions. Thread the tail through a few stitches one way, then turn and go back the other way. Changing direction locks it.
- Don't cut the tail short. Leave at least 10 cm until the piece is nearly finished.
- Work over the tail. In round 2 you can crochet over the tail for a few stitches for extra hold.
Common magic ring problems and fixes
The ring won't close
You probably worked the stitches over the working yarn instead of the ring and tail, or the yarn is too grippy. Make sure every stitch goes around both strands of the ring. Pull the tail, not the working yarn.
The ring slipped off my fingers
That's what the chain 1 in step 4 is for. Once it is made, you can put the ring down on the table and work into it there.
I have 5 or 7 stitches instead of 6
Very common. The chain 1 is easy to mistake for a stitch. Pull the tail only part-way first, count, then close it fully.
There's still a tiny hole
Your yarn may be springy. Tug the tail once more after round 2, and on your next ring wrap the yarn twice around your fingers (a "double magic ring") for a firmer centre.
Alternatives if the magic ring isn't working
- Chain 2 start: chain 2, then work your first-round stitches into the second chain from the hook. Pull the tail a bit to tighten it. This is a popular choice for chenille yarn amigurumi, where magic rings can be hard to close.
- Smooth-yarn ring: make the ring in a thin smooth yarn of the same colour, then switch to your main yarn in round 2.
Practise on a real mini project
The fastest way to master the ring is to use it a few times in a row. Small one-piece animals are perfect because you start a new ring with each one. The mini axolotl and penguin ornament patterns both include the magic ring as a technique lesson, along with the invisible decrease.
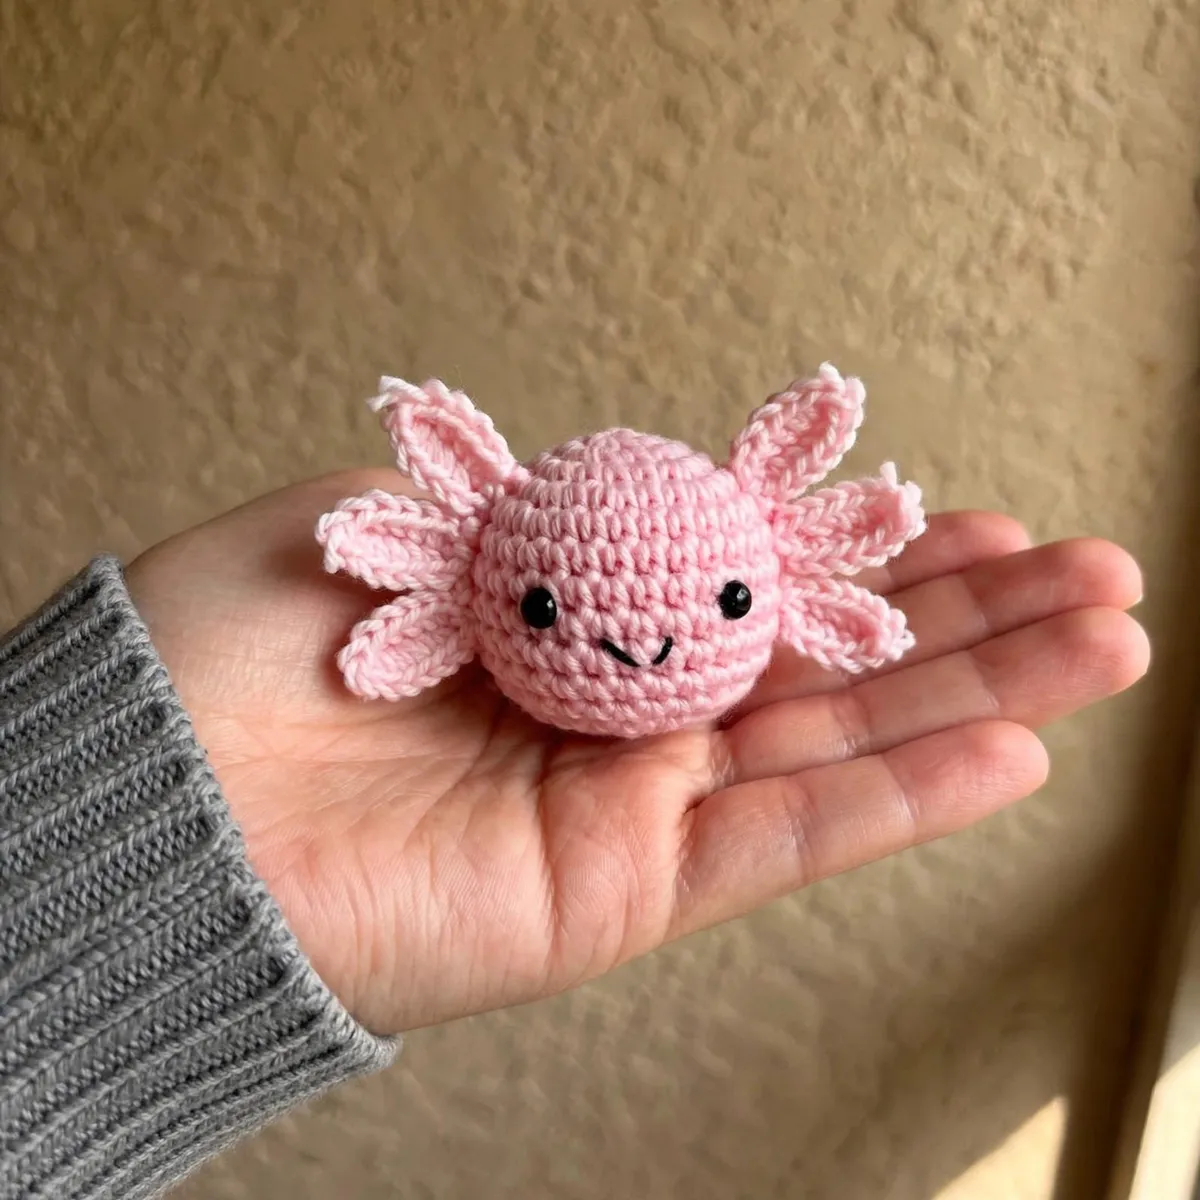
No-Sew Chubby Axolotl · LoopSouk pattern
A kawaii no-sew axolotl worked head-to-tail in one chubby piece, with six frilly gills crocheted in. 8–9 cm, DK yarn, 3.5 mm hook, 4 colourways, plush or keychain.
≈ $3.00 · instant PDF download
The mini Christmas tree garland is another good practice piece: you make five small trees, and the magic ring is one of the pattern's 7 technique lessons.

Mini Christmas Tree Garland · LoopSouk pattern
Crochet a garland of five mini Christmas trees in one evening: ruffled tiers, 12 bobble ornaments worked in, no sewing or gluing. Each tree approx. 7.5 cm, cord approx. 80 cm.
≈ $3.00 · instant PDF download
What comes after the magic ring
Once round 1 is done, nearly every amigurumi grows the same way. Round 2 is usually an increase in every stitch (12 stitches), round 3 alternates one single crochet with one increase (18), round 4 adds one more plain stitch between increases (24), and so on. This creates a flat circle that becomes the base or top of your shape. When the pattern stops increasing and works the same number of stitches round after round, the circle curves up into a cup. That is the side of the head or body. Learning to recognise this rhythm is the moment patterns start to make sense, and it all begins with a neat, closed ring.
FAQ
Is a magic ring the same as a magic circle?
Yes. Magic ring, magic circle, magic loop and adjustable ring all describe the same technique: a loop you crochet into and then pull closed.
Does the chain 1 count as a stitch in a magic ring?
No. The chain 1 only secures the ring. Your first stitch is the first single crochet you work into the ring.
How do I stop my magic ring from coming undone?
Pull the tail tight, work another round, pull again, then weave the tail in through several stitches in one direction and back in the other direction before trimming.
Why is there a hole in my magic ring?
The tail was not pulled tight enough, or the stitches were worked around only one strand. Pull the tail firmly and make sure every stitch goes around both the ring and the tail.
Can I start amigurumi without a magic ring?
Yes. Chain 2 and work the first round into the second chain from the hook, then tighten the tail. It leaves a slightly bigger centre but is easier in some yarns.
Looking for your next project? See every LoopSouk PDF pattern in one place, each with its own article and Etsy link.
Browse all LoopSouk patterns

